Building Our Vegetable Garden

I’d wanted a garden for a long time before we moved to this house. So as soon as we saw this garden my heart was sold and my mind got to work dreaming of all the vegetables we could grow. I knew we wouldn’t quite be Tom and Barbara in ‘The Good Life’, but I very much liked the idea of growing some of our own food.
We are lucky to have inherited a garden that was once owned by the head gardener for the grounds of a grand estate up the road. We were also lucky that the couple that did up the property did some of the work to the garden for us. They put in decking, and steps to help with the gradual decline towards the bottom of the garden, and removed the central bird table and stepping stones. It was ‘tidy’ when we bought it, but still a long way off my vision.
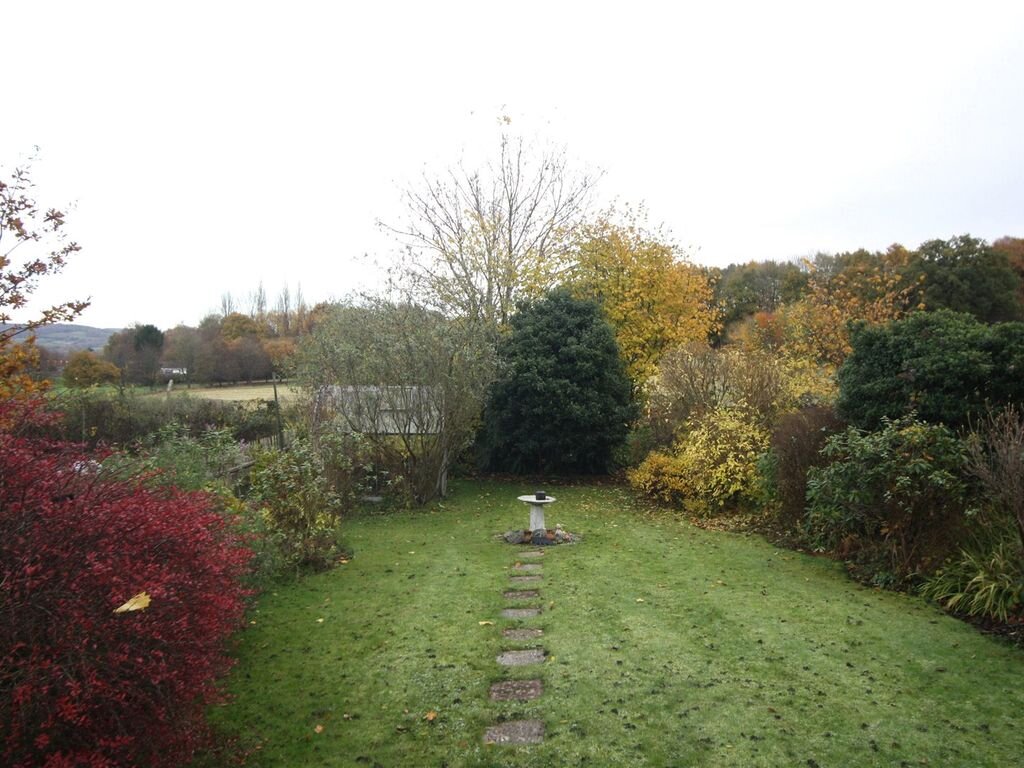
The original garden

The garden when we bought the house
We spent a while drawing ideas, and using Pinterest to agree on what would work in the space we had without encroaching on the lawn too much. Alex even cut out little planters on a plan to scale so we could work out how many planters we could fit and what the best layout would be. Of course once the planning and drawing and imagining was done the hard work really began.
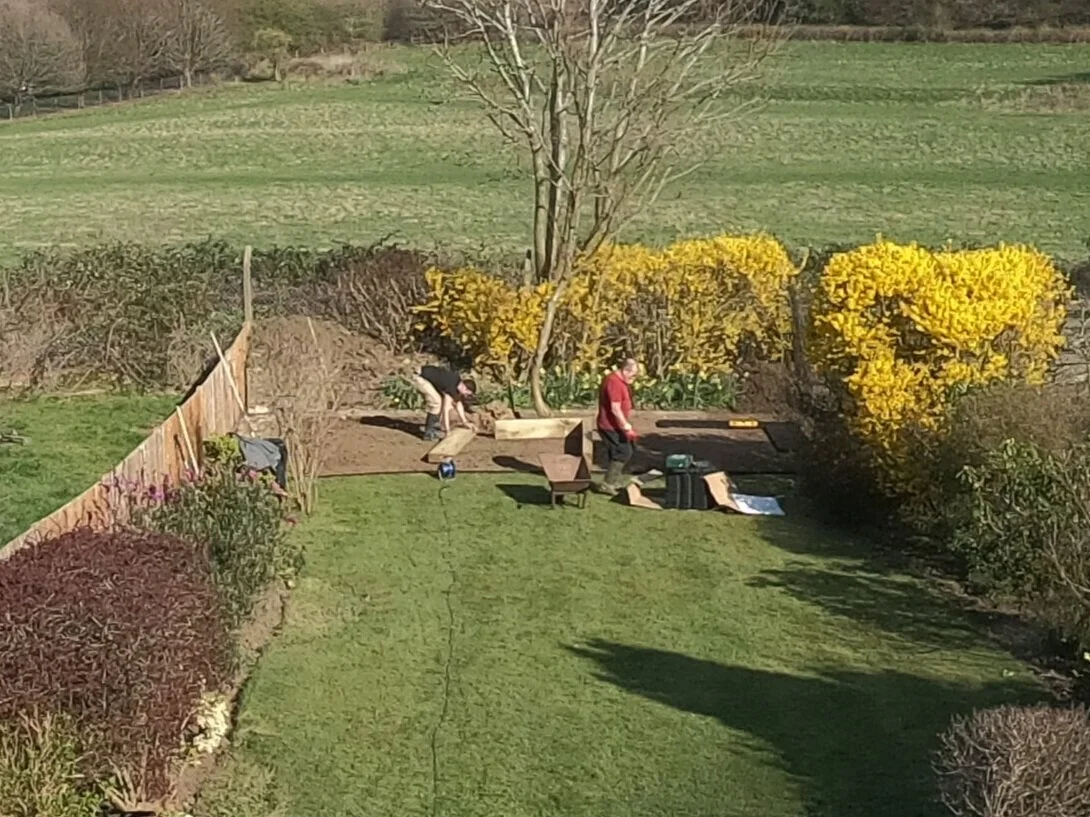
First things first, we had to remove the trees and bushes that were in the way. This is one of those jobs that sounds a lot easier than the reality. Chopping the tree down and into pieces was not the issue, but removing the stumps and roots was really hard work and extremely time consuming. It took a lot of man power (Alex’s, not mine), lots of pivoting and levering until they were released from the ground and removed. In total we removed three big tree/bushes from the space at the bottom so there was a clear area for our vegetables and shed to live.

Next was cutting in the dividing line across the bottom of the lawn from one edge to the other. It was tricky to get it straight, we used string, pegs and a spirit level. It’s not perfect but it’s as straight as two amateurs were going to achieve.


On the area that was becoming the vegetable patch we had to remove the turf and rotavate the soil. We hired a rotavator from HSS for about £50, and it worked really well to break up the clay soil we have there. It would have been even easier if we’d remembered to water the ground for the few days preceding - learn from our mistake!
Once it was fully rotavated we used a wacker plate (also hired from HSS) to level it off. This was a really tough job, the wacker we had initially wasn’t working properly and it was a heavy machine to try and manoeuvre. It was essential the ground was as level as possible to ensure the shed and raised bed planters stood straight, so we had to get it as level as possible.
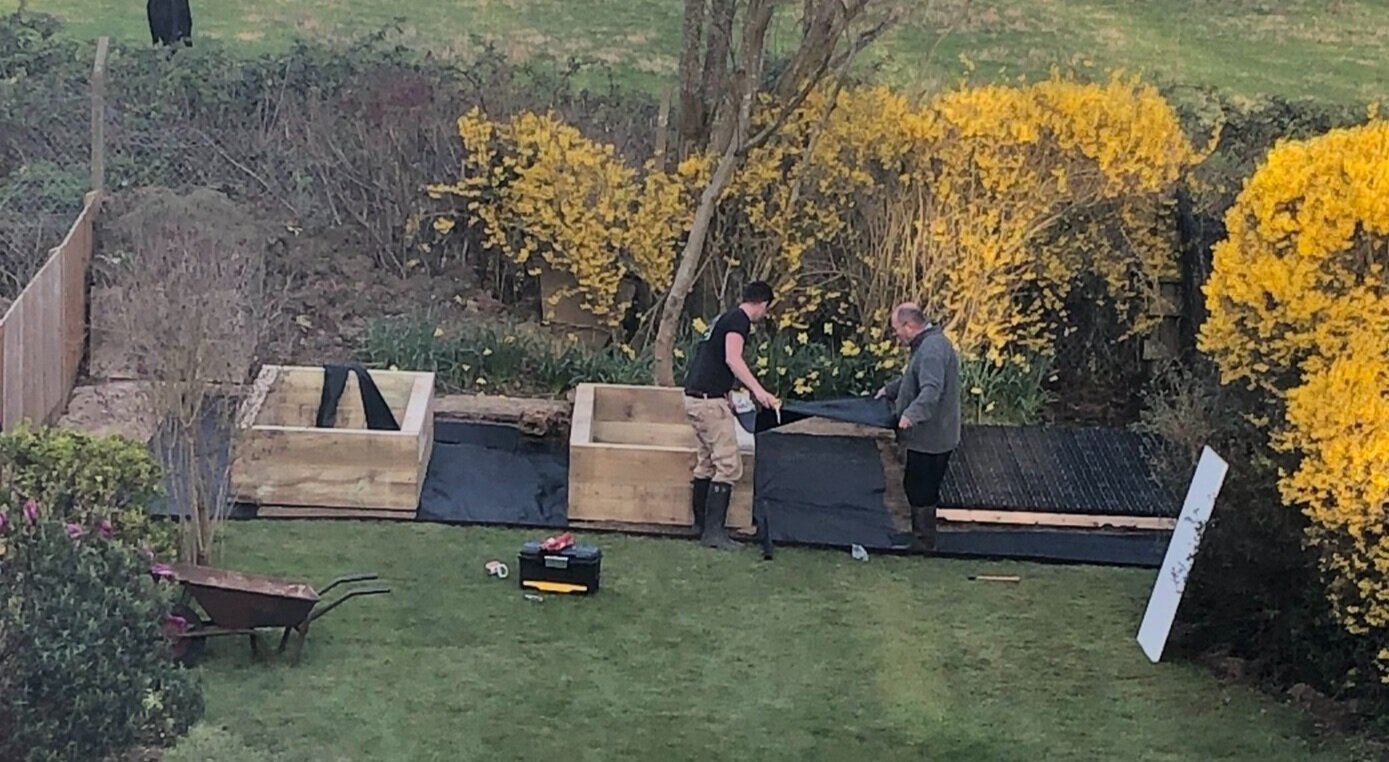
Building the two raised beds wasn’t too tricky by comparison to the work needed for the ground beneath. We bought raised bed kits from railwaysleepers.com where we could pick the height and length, and they were delivered all the way onto our decking. They came with all the necessary screws to assemble them too, so they took shape really quickly.
Next we had to create a level base for the new shed, we were having one delivered and assembled for us, but they wouldn’t put it together unless the base was completely level so the pressure was on to get it right before they arrived. We used a ProBASE base, which is an eco-friendly interlocking grid system, it’s lightweight and easy to install – but again the spirit level was back out to try and get it as level as possible so as not to cause any issues further down the line. Alex built a frame from wood for the ProBASE to sit, and packed it full of soil to help get it as flat as possible as the garden is ultimately on a slope that is hard to overcome (even with the rotavator and wacker). It was easier, cheaper and quicker than creating a concrete base like many shed have, and it was great for us to do ourselves as it didn’t require any specialist skills or equipment.

Around the planters and the shed base we put down a weed membrane, this was essential because we were building this area on top of what had been grass, so to ensure we didn’t get grass re-growing or any weeds popping up, the membrane acted as a barrier whilst still allowing water to pass through.

Our next big delivery was two tons of loam top soil (a ton for each planter), and 2 tons of bark chippings for the ground. We also added 5 bags of compost to each planter to enrich the soil and make it suitable for growing vegetables in as soon as possible. We ordered the big bags of bark and soil from Travis Perkins but it could only be deposited at the front of the house, so we spent hours wheeling a wheelbarrow at a time from the front of the house to the bottom of the garden. We had one squeaky wheeled wheelbarrow – it was so incessant that our neighbour came round and lent us his wheelbarrow and some WD40 to speed up the job!
The last thing was for the shed to be delivered and built, in hindsight I think we should have gone for a slightly bigger shed, and probably slightly better quality as it’s a space that we use more than we anticipated, and over the time we’ve collected more and more tools and garden paraphernalia to store safely. But it does the job, and if we keep it tidy, it’s perfect.

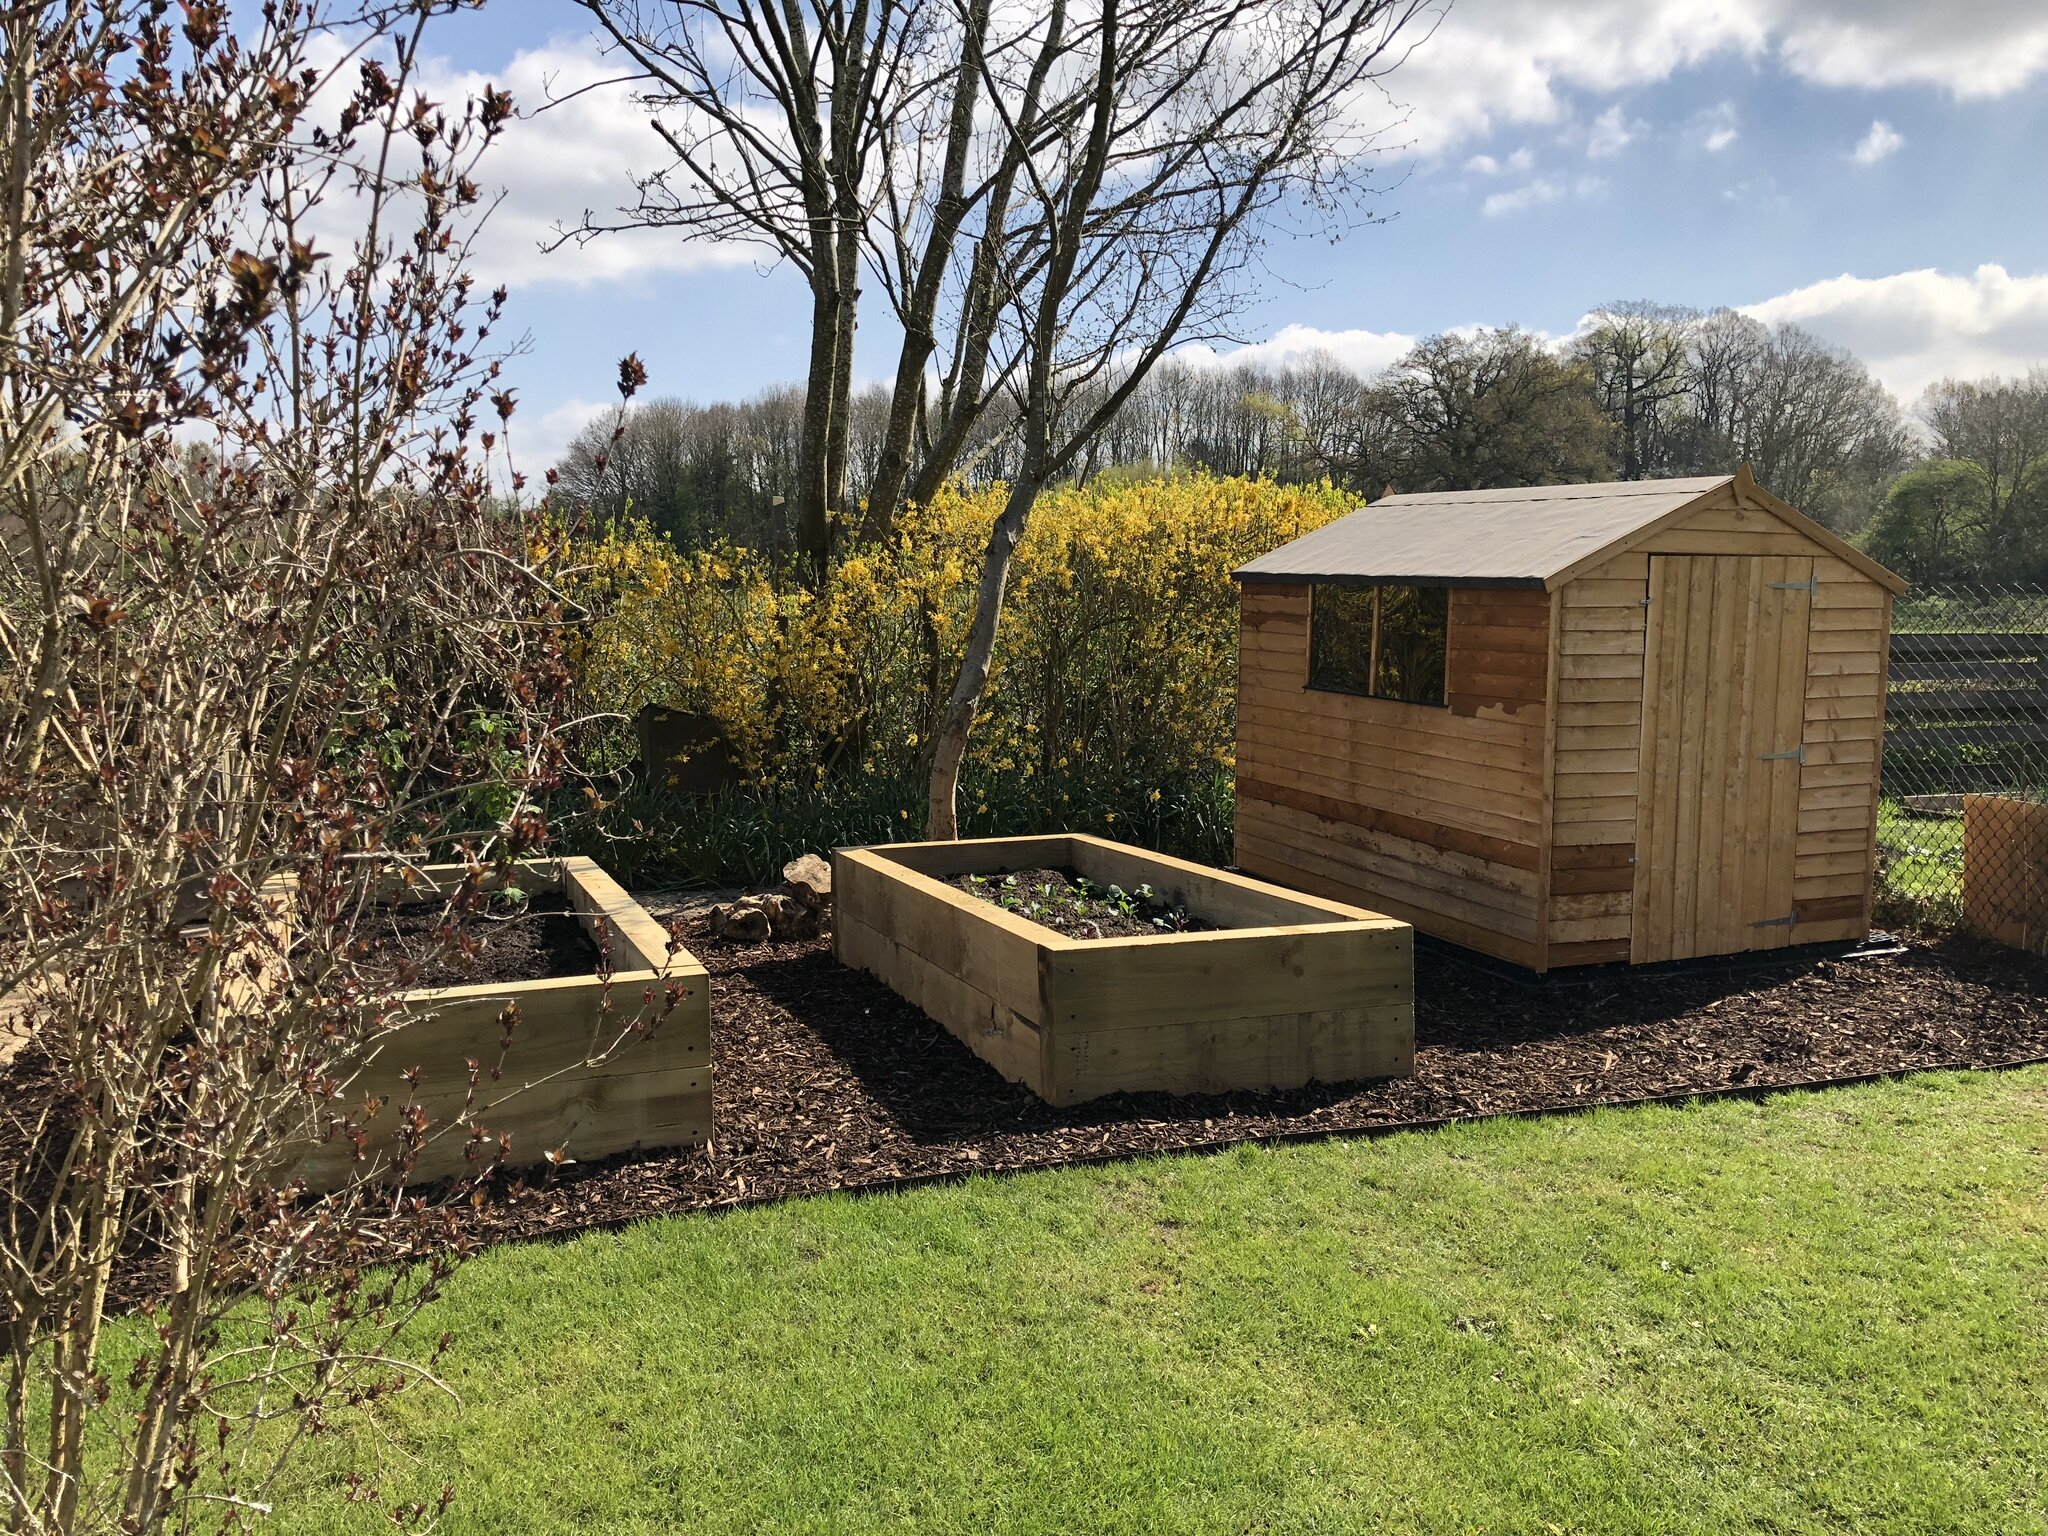
So there you have it, from bushes and grass, to a designated vegetable growing area. It took us about a week in total, a lot of man hours, and some careful planning of deliveries and construction, but it was worth it all. I absolutely love this part of the garden.
If you are going to take on a project like this, or transform an area of your garden into somewhere to grow vegetables, my advice would be: don’t cut corners. It paid off doing a thorough job, the aches and pains and time were all worth it. We have a level area, a sturdy shed, and really good quality raised beds which will last a lifetime (hopefully!). By all means you don’t need double height raised beds like ours, you also don’t need an area as big as ours. But plan first and don’t rush the stages to get the perfect area created for you.
Anything is possible, in whatever space you have. I’m almost jealous of those who have a blank canvas now and get to create their space from scratch. I’d love to hear what you are planning, or how your own transformation panned out.